
Quick Facts
- Staining or painting protects a wooden fence from moisture, sun, and wear.
- Proper cleaning and surface prep help the finish last longer.
- Stain keeps a natural wood look, while paint offers stronger color coverage.
- Apply exterior products in mild, dry weather for better results.
- Regular cleaning and touch-ups help maintain the fence's appearance.
What's In This Guide
- How to Stain or Paint a Wooden Fence (Step-by-Step Guide for Long-Lasting Results)
- Why Protecting Your Wooden Fence Matters
- Stain vs. Paint: Understanding the Difference
- When Is the Best Time to Stain or Paint a Fence?
- Essential Tools and Materials You'll Need
- Fence Maintenance Tips to Keep It Looking New
- Frequently Asked Questions
- Protect and Beautify Your Fence With Expert Help
Staining or painting a wooden fence can significantly improve both its appearance and durability. Over time, exposure to sunlight, rain, humidity, and changing temperatures can cause wood to fade, dry out, or develop surface damage. Applying a protective finish helps preserve the structure of the fence while keeping it looking clean and well-maintained.
However, achieving long-lasting results requires more than simply applying a coat of paint or stain. Proper preparation, the right weather conditions, and correct application techniques all play a role in how well the finish performs over time.
Here are the key steps to stain or paint your wooden fence for long-lasting beauty.
How to Stain or Paint a Wooden Fence (Step-by-Step Guide for Long-Lasting Results)
Proper preparation and application techniques determine how long the finish will last. Rushing through the process often leads to uneven coverage or early failure.
Step 1: Clean the Fence Thoroughly
Start by removing all dirt, debris, mold, and mildew from the fence. A pressure washer or deck cleaner works well for this step. Cleaning opens the wood pores and allows the stain or paint to penetrate effectively.
If the fence appears dark or weathered, applying a wood brightener can restore the wood's natural color. After cleaning, allow the fence to dry completely for one to two days before applying any coatings.
Step 2: Inspect and Prepare the Surface
Once the fence is dry, inspect the entire structure. Look for loose boards, protruding nails, or damaged sections. Tighten fasteners and make any necessary repairs before finishing.
Lightly sanding rough or splintered areas can improve the final appearance and help the coating adhere evenly.
Step 3: Choose the Right Application Method
Different tools can be used depending on the size of the fence and the level of detail needed. Spraying often works well for faster coverage, while brushing or rolling can help with more precise areas and a more even finish.
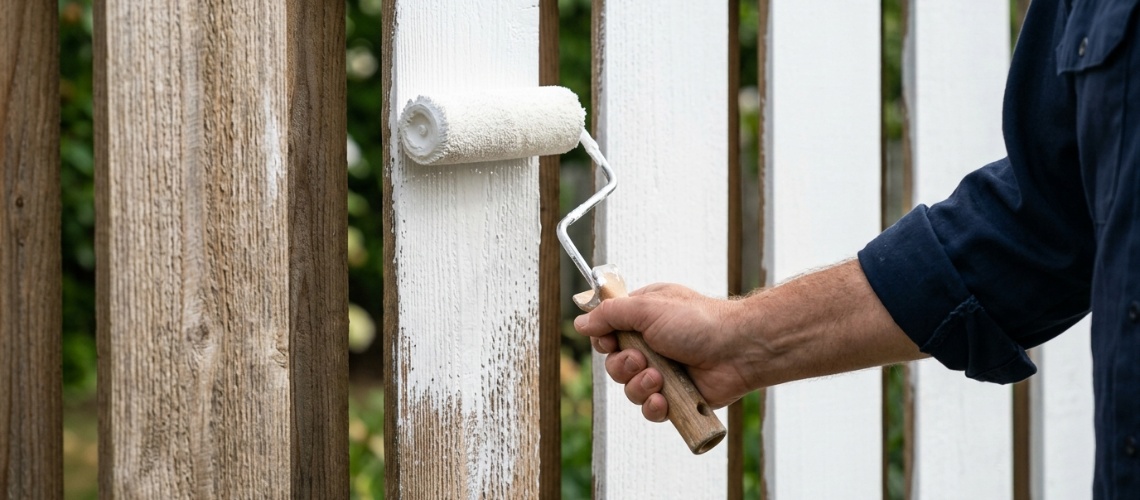
Step 4: Apply the First Coat
Apply the stain or paint evenly using vertical downward strokes that follow the direction of the wood grain. This technique helps prevent lap marks and streaks. Thin coats are generally more effective than heavy coats. Thick layers tend to dry unevenly and may crack or peel later.
Step 5: Use the Back-Brushing Technique
Back-brushing is a technique that significantly improves durability. Immediately after spraying an area, use a brush to work the coating into the wood. This method ensures deeper penetration and helps create an even finish. It also reduces the risk of overspray or missed spots.
Step 6: Apply a Second Thin Coat
After the first coat has dried according to the manufacturer's instructions, apply a second thin coat. Multiple thin layers provide stronger protection and richer color depth than a single heavy application.
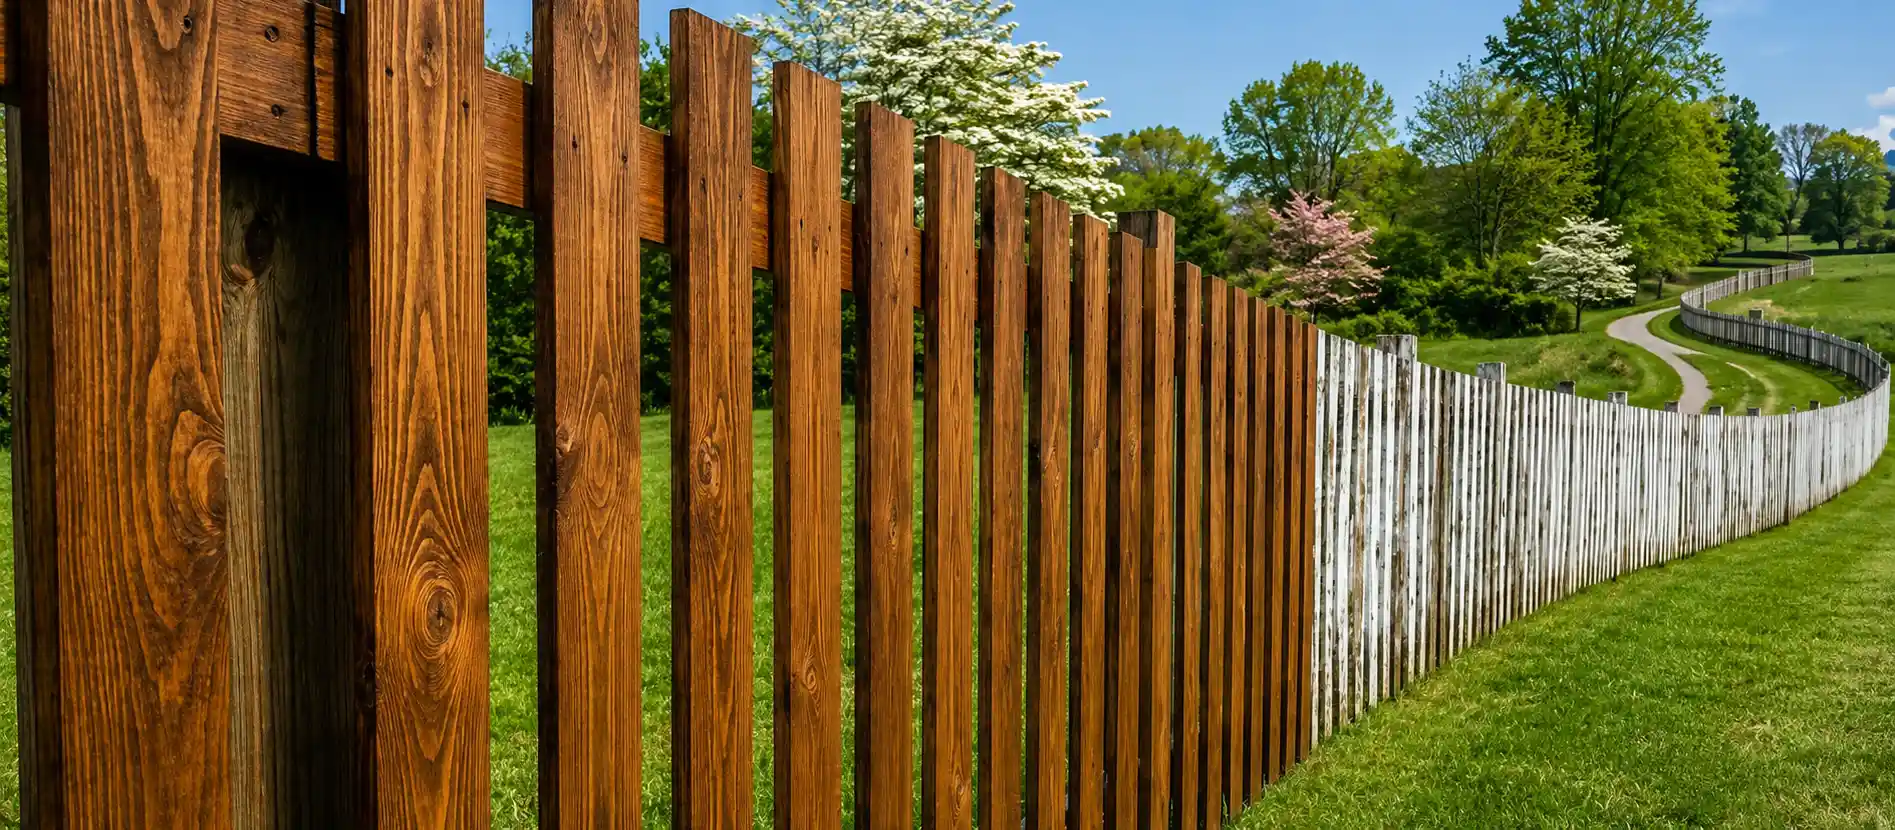
Why Protecting Your Wooden Fence Matters
A wooden fence does more than define your property line. It also faces daily exposure to weather, moisture, and sunlight, which means protection is essential if you want it to stay attractive and structurally sound.
It Helps Prevent Moisture Damage
Wood naturally absorbs water, and repeated exposure can lead to rot, swelling, and warping over time. Staining or painting creates a barrier that helps keep excess moisture from soaking into the fence.
It Reduces Sun and UV Wear
Constant sun exposure can dry out wood, fade its color, and weaken its surface fibers. A protective finish helps shield the fence from UV damage and slows down premature aging.
It Extends the Life of the Fence
A protected fence is less likely to crack, split, or deteriorate early. Regular finishing and maintenance help homeowners get more years out of their investment.
It Keeps the Fence Looking Well-Maintained
A stained or painted fence has a cleaner, more finished overall appearance than bare, weathered wood. Protection helps preserve color, texture, and curb appeal.
It Helps Minimize Costly Repairs
When wood is left exposed, small issues can turn into larger structural problems that require repair or replacement. Protecting the fence early helps reduce long-term maintenance costs.
Stain vs. Paint: Understanding the Difference
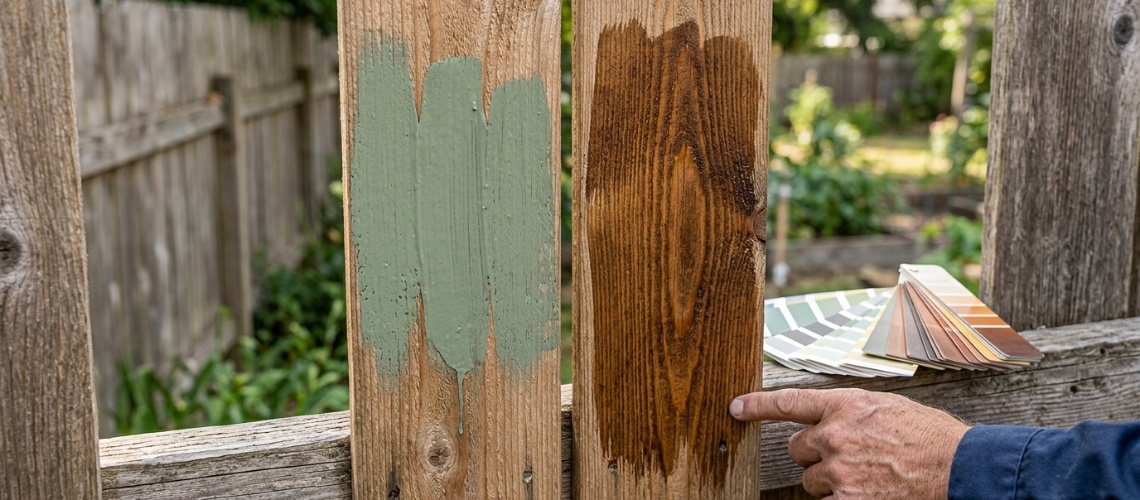
Choosing between stain and paint is one of the most important decisions when finishing a wooden fence. Both provide protection, but they behave differently on the wood.
What Fence Stain Is
Fence stain soaks into the wood instead of sitting on top of it, so the natural grain and texture still show through. It is less likely to peel or chip, and it usually fades more evenly over time, which makes upkeep easier.
What Fence Paint Is
Fence paint coats the surface of the wood and creates a solid, more uniform finish. It offers stronger color coverage and UV protection, but it can peel or chip over time as the wood expands and contracts.
|
Option |
Pros |
Cons |
|
Stain |
Penetrates deep into the wood and helps prevent peeling. Highlights the natural grain for a more organic look. |
Fewer color options, and may need to be reapplied more often. |
|
Paint |
Provides vibrant color options and a uniform finish that covers wood grain. Color typically lasts longer. |
Can chip or peel over time and may require more preparation before repainting. |
Which Option Is Best for Your Fence?
The best choice depends on your fence's condition, the look you want, and how much maintenance you are comfortable with.
- Choose stain if your fence is newer. It enhances the natural wood grain and keeps the fence looking more natural.
- Choose paint if your fence is older or uneven. Paint provides solid coverage that can hide discoloration, stains, and wear.
- Choose a stain for easier maintenance. It fades gradually and usually requires less scraping during future touch-ups.
- Choose paint for bold color and strong UV protection. It offers consistent color and better coverage for decorative finishes.
When Is the Best Time to Stain or Paint a Fence?
Timing plays a major role in how well stain or paint adheres to wood and how long the finish lasts. Choosing the right weather conditions helps the coating dry evenly and bond properly with the fence.
Moderate Temperatures (50°F to 80°F)
Stain and paint perform best when temperatures stay between 50°F and 80°F. This range allows the coating to absorb into the wood and dry at a steady rate.
Low Humidity Conditions
Low humidity helps stain or paint dry more evenly and bond better to the wood surface. Damp conditions and relative humidity above about 70 to 80% can slow curing, increase the chance of streaking or blotching, and create conditions that are more favorable for mold.
Dry Weather With No Rain Forecast
Rain can wash away fresh stain or paint before it has time to fully dry. It is best to choose a day with no rain expected for at least 48 hours after application.
Essential Tools and Materials You'll Need
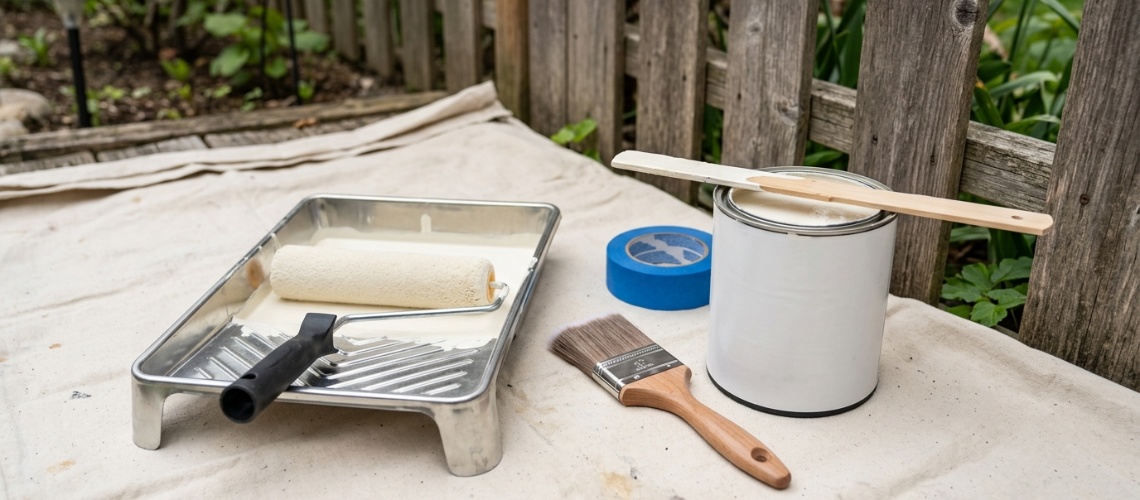
Using the right tools makes fence staining or painting easier, faster, and more consistent. Good materials also help the finish last longer and look better over time.
Pressure Washer or Deck Cleaner
A pressure washer or deck cleaner removes dirt, mildew, and old debris from the wood surface. Cleaning the fence first helps the stain or paint adhere properly.
Wood Brightener
Wood brightener helps restore the natural color of older, darkened, or weathered wood. It can also improve the final appearance before you apply any finish.
Exterior-Grade Stain or Paint
Choose a high-quality exterior stain or paint made specifically for outdoor wood surfaces. These products are designed to handle moisture, sunlight, and changing weather conditions.
Airless Sprayer, Brushes, and Rollers
An airless sprayer helps cover large sections quickly and evenly. Brushes and rollers are useful for detail work and for working the product deeper into the wood grain.
Sandpaper, Drop Cloths, and Safety Gear
Sandpaper helps smooth rough spots and prepare the surface before application. Drop cloths and safety gear help protect nearby areas and keep the project safer and cleaner.
LEARN MORE ABOUT PROFESSIONAL FENCING SERVICES
Fence Maintenance Tips to Keep It Looking New
A stained or painted fence lasts longer when it is cared for consistently. Simple upkeep helps preserve the finish and prevents minor issues from turning into bigger problems.
Clean the Fence Annually
Annual cleaning removes dirt, algae, and mildew that can wear down the finish over time. A light rinse or gentle pressure washing is usually enough to keep the surface in good shape.
Inspect for Early Signs of Wear
Check the fence regularly for fading, peeling, cracks, or other minor damage. Catching these issues early makes repairs easier and helps protect the wood underneath.
Handle Small Touch-Ups Promptly
Touching up worn or damaged areas helps maintain the fence's appearance and prevents further deterioration. Small fixes are usually easier and less costly than larger repairs later on.
Reapply Stain or Paint as Needed
Most fences need reapplication every 2–3 years for stain and 3–5 years for paint, depending on exposure and product quality. If water stops beading on the surface and starts soaking into the wood, it is usually time to reapply the finish.
➤ ALSO READ: Wood Fence Cost per Foot: What to Expect From Fence Builders Near Me
Frequently Asked Questions
How long should I wait before staining a new fence?
A new fence usually needs time to dry out before it is ready for stain or paint. Most new wood fences (especially pressure-treated wood) should dry for 3–6 months before staining or painting.
Is staining better than painting a fence?
It depends on the look you want and how much maintenance you are willing to do. Stain keeps more of the natural wood appearance, while paint offers stronger color coverage.
Can I stain over paint or paint over stain?
Paint can often go over stain with the right preparation. Stain usually does not work well over painted surfaces.
How long does fence stain typically last?
Fence stain can last for a few years, but that depends on weather exposure, product quality, and maintenance. Fences in harsher conditions may need attention sooner.
Do I need to pressure wash before staining or painting?
Cleaning the fence first is usually recommended so the finish can adhere properly. In many cases, pressure washing or using a deck cleaner helps remove buildup from the surface.
Protect and Beautify Your Fence With Expert Help
A wooden fence can remain beautiful and durable for many years when it receives proper care. Cleaning the wood thoroughly, applying exterior-grade coatings under the right weather conditions, and using techniques like back-brushing all contribute to a finish that lasts longer and performs better.
For homeowners who prefer professional results and long-term protection, working with experienced fence specialists can simplify the process.
Connecticut Fence & Gate helps homeowners in Litchfield County maintain strong, attractive fences through expert installation, maintenance, and finishing services that protect wood fences from the elements while preserving their natural beauty.
Contact Connecticut Fence & Gate to keep your wooden fence protected, polished, and built to last.