

Quick Facts
- Proper layout and post depth are key to a stable vinyl fence.
- Calling 811 helps prevent damage to underground utilities.
- Concrete posts offer stronger long-term support.
- Small mistakes can lead to alignment and stability issues.
- Simple maintenance keeps the fence in good condition.
What's In This Guide
- What to Know Before Installing a Vinyl Fence
- How to Install Vinyl Fencing in Soil and Gravel
- How to Install Vinyl Fencing in Concrete
- Common Mistakes to Avoid During DIY Plastic Fence Installation
- Pro Tips for a Professional-Looking Vinyl Fence
- Maintenance Tips After Installation
- Frequently Asked Questions
- Get Reliable Results with Professional Fence Installation
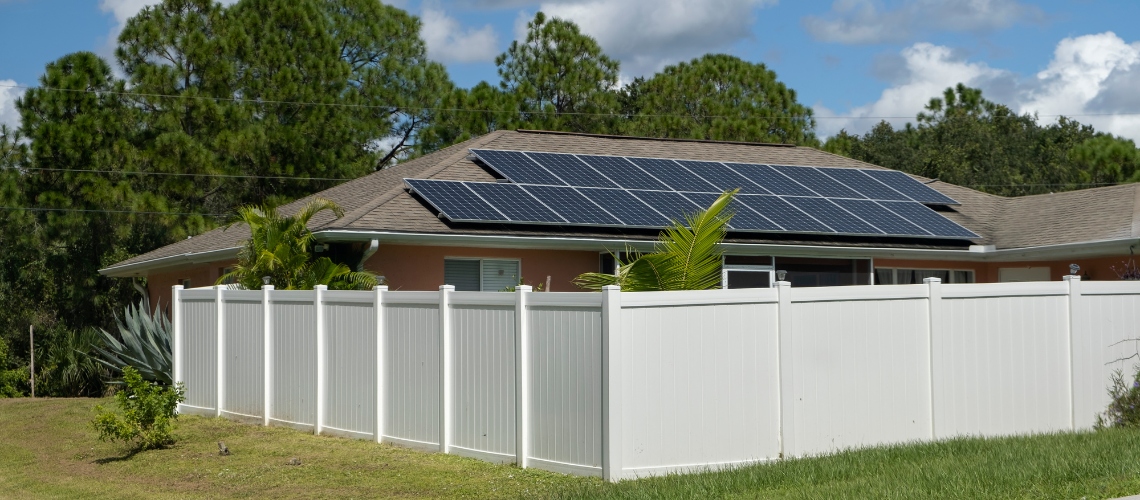
Vinyl fencing has quickly become a go-to option for homeowners who want a clean, durable boundary without the upkeep of wood. But when it comes to DIY vinyl fence installation, success depends less on effort and more on precision.
Getting it right means planning your layout carefully, calling 811 before digging, and setting posts to prevent shifting over time. From aligning posts with string lines to installing rails before pickets, each step plays a critical role in the final result.
Here are the essential steps and practical tips to help you install a vinyl fence correctly and avoid the most common mistakes.
What to Know Before Installing a Vinyl Fence
DIY vinyl fence installation is well within reach for homeowners who are comfortable with basic tools and measurements. However, it is not a quick weekend project unless the layout is simple and the terrain is flat.
Local Considerations in Litchfield County
Plastic fence installation in Litchfield County comes with a few specific considerations:
- Frost depth: In Connecticut, frost lines can reach 36 inches or more. Posts must be set below this depth to prevent shifting during freeze-thaw cycles.
- Soil conditions: Many areas have rocky or clay-heavy soil, which may require deeper digging or added drainage layers.
- Local regulations: Permits or zoning approvals may be required depending on fence height and location.
Materials and Tools Checklist
Before starting your project, make sure you have all the required tools and materials ready. Buying from a reliable local supplier can also help you find compatible vinyl fence components and avoid issues during installation.
|
Required Tools |
Essential Materials |
|
• Post hole digger or power auger • Level and measuring tape • String line and stakes • Circular saw with a fine-tooth blade • Drill and exterior-grade screws |
• Vinyl fence panels, posts, rails, and pickets • Concrete mix for post setting • Gravel for drainage base • Post caps and vinyl adhesive |
Where to find fencing supplies near me
- Local hardware stores
- Fence supply companies
- Home improvement centers
- Landscape supply yards
- Building material dealers
How to Install Vinyl Fencing in Soil and Gravel
For lighter-duty fencing or certain soil conditions, posts can be installed using a combination of gravel and compacted soil. This approach is sometimes used in PVC fence installation projects where proper drainage and soil conditions allow for stable support without concrete.
Preparing the Layout and Post Placement
Start by marking your fence line with stakes and a string to maintain a straight, consistent alignment. Space posts evenly, typically between 6 and 8 feet apart, to support panels without sagging.
Digging and Adding a Gravel Base
Dig each hole to about one-third the length of the post and wide enough to allow proper backfill. Add a layer of gravel at the bottom to improve drainage and reduce moisture buildup around the post.
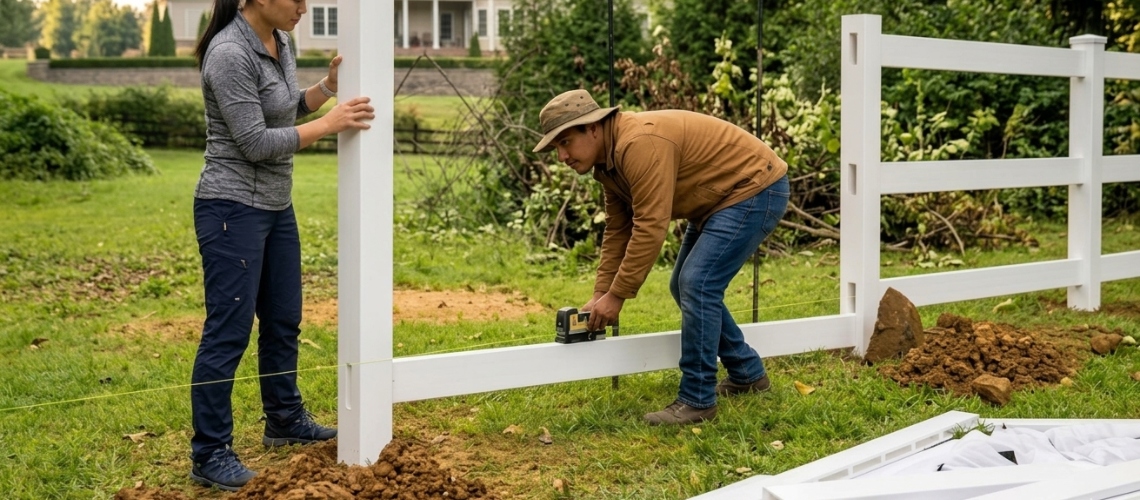
Setting and Stabilizing the Post
Place the post in the hole and use a level to ensure it is straight before backfilling. Alternate layers of gravel and soil, compacting each layer firmly to secure the post in place.
Final Compaction and Drainage
Once the hole is filled, tamp the top layer tightly and shape a slight mound around the base to direct water away. Allow the post to settle for a day or two before attaching any fence panels.
How to Install Vinyl Fencing in Concrete
Concrete is the most common method for securing fence posts, especially for vinyl fencing, because it provides long-term stability and strength.
Marking Layout and Digging Post Holes
Use stakes and a string line to map out post locations and maintain straight alignment. Dig holes deeper than the frost line when necessary, typically around 30 to 36 inches, with extra depth for a gravel base.
Adding Gravel and Positioning Posts
Pour a layer of gravel into each hole to support drainage and prevent water accumulation. Insert the post and position it roughly in place before adding concrete.
Pouring Concrete and Adding Water
Fill the hole with concrete mix, leaving a few inches at the top, then add water according to the manufacturer's instructions. Work efficiently, especially when using fast-setting concrete, to avoid premature hardening.
Leveling and Securing the Post
Adjust the post immediately after adding water, ensuring it is plumb and aligned with the string line. This step is critical in PVC fence installation, as proper alignment affects the overall strength and appearance of the fence. Tamp the concrete around the base to eliminate air pockets and improve stability.
Finishing the Base for Drainage
After the concrete begins to set, form a slight slope or mound at the base to direct water away from the post. Once fully cured, you can cover the surface with soil or gravel for a cleaner appearance.
Common Mistakes to Avoid During DIY Plastic Fence Installation
Even small errors during installation can lead to long-term issues with stability, alignment, and overall appearance. Understanding the most common mistakes in DIY plastic fence installation helps you avoid costly fixes and ensures a more durable, professional-looking result.
Skipping Utility Checks
Failing to call 811 can result in damage to gas, water, or electrical lines. This is a critical step in learning how to install PVC fence safely, as it helps prevent serious safety hazards and potential legal consequences.
Improper Post Depth
Shallow posts are one of the most common causes of leaning fences, especially in colder climates. If posts are not set deep enough, shifting soil and freeze-thaw cycles can gradually affect the fence's stability.
Ignoring Ground Clearance
Leaving about 1 inch of clearance at the base allows for uneven terrain and helps prevent stress on panels. Without that space, sections of the fence may sit unevenly or place too much pressure on the bottom rail.
Not Using a String Line
Even slight deviations become noticeable over long distances, especially on straight fence runs. A string line helps keep posts and panels consistently aligned from one end of the fence to the other.
Rushing Concrete Curing
Installing panels too soon can shift posts before they fully set, weakening the structure. Giving concrete enough time to cure helps create a more secure and longer-lasting fence.
Weak Gate Posts
Gate posts must be reinforced because they carry more weight and movement than standard line posts. Without proper support, gates can sag, drag, or fall out of alignment over time.
Over-Tightening Screws
Vinyl needs room to expand and contract with temperature changes. Tight fasteners can place unnecessary stress on the material and increase the risk of cracking or warping.
Hammering Vinyl Directly
Vinyl can crack under direct impact, especially during installation or adjustment. Using a wood block as a buffer helps protect the surface and reduce the chance of damage.
➤ YOU MIGHT ALSO LIKE: Vinyl Fence Installation Near Me: Cost Per Foot Guide
Pro Tips for a Professional-Looking Vinyl Fence
Even a well-built vinyl fence can look off if the details are not handled carefully during installation. A few simple best practices can make the difference between a fence that looks DIY and one that looks clean, straight, and professionally finished.
Check Level Alignment Frequently During Installation
Vinyl fence posts and panels need to stay consistently level and plumb from start to finish. Checking alignment often as you work helps catch small issues before they turn into visible mistakes across the full fence line.
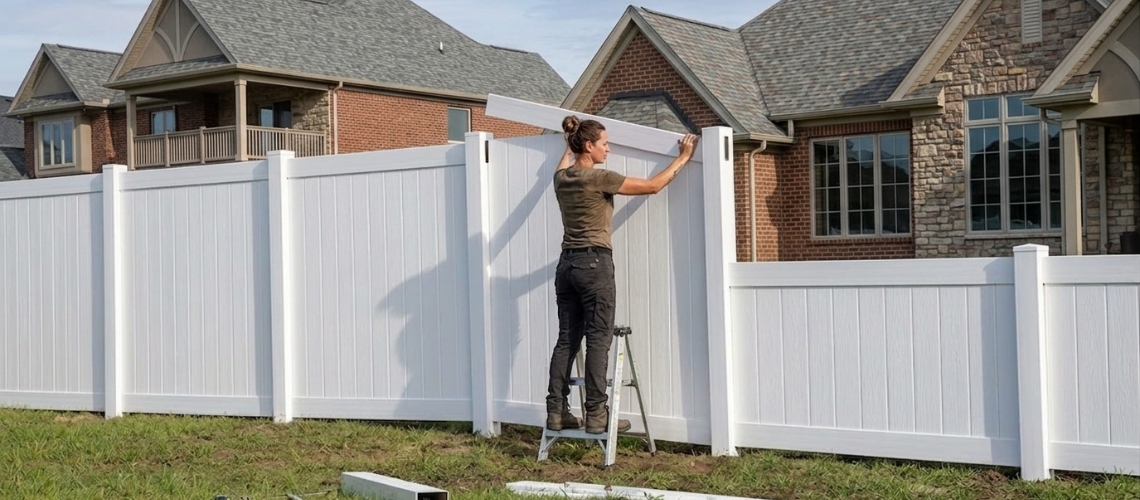
Measure Twice Before Cutting Panels
Accurate measurements are essential when trimming panels to fit a specific space. Taking the time to double-check before cutting helps prevent wasted materials and uneven sections.
Work in Sections to Maintain Consistency
Installing the fence in smaller sections makes it easier to control spacing, alignment, and overall appearance. This approach also helps you spot problems early instead of correcting them after multiple panels are already in place.
Adjust for Slopes Early Instead of Forcing Panels Later
If your yard has uneven ground, account for those slope changes before setting posts and panels. Planning for the terrain early helps you choose the right installation method and avoid awkward gaps or misaligned sections.
Avoid Installing in Extremely Cold Temperatures
Very cold weather can make vinyl more rigid and easier to crack during handling or installation. Working in milder conditions helps reduce the risk of damage and makes fitting components together much easier.
Explore Our Vinyl Fence Installation Services
Maintenance Tips After Installation
Vinyl fencing is known for being low maintenance, but that does not mean it should be ignored after installation.
Clean Periodically With Soap and Water
Routine cleaning helps remove surface dirt, grass stains, and other buildup that can dull the fence over time. In most cases, mild soap, water, and a soft cloth or sponge are enough to keep vinyl looking clean.
Inspect Posts and Rails Annually
A yearly inspection helps you catch loose rails, shifting posts, or early signs of wear before they become bigger problems. Checking these parts regularly can help maintain both the fence's appearance and structural integrity.
Address Minor Alignment Issues Early
Small alignment problems are easier to correct when noticed early. Fixing slight leaning or spacing issues promptly can help prevent more noticeable damage later.
Remove Dirt or Organic Buildup
Leaves, mud, algae, and other organic matter can collect around the base of the fence over time. Keeping these areas clear helps maintain a cleaner look and reduces unnecessary moisture exposure.
Frequently Asked Questions
Is vinyl fencing durable?
Vinyl fencing is durable when it is made from quality materials and installed correctly. It generally holds up well against moisture, insects, and everyday weather exposure, but its performance still depends on site conditions and overall installation quality.
Is vinyl fencing eco-friendly?
Vinyl fencing can be a practical long-term option because it lasts for years and does not require frequent maintenance products like paint or stain. Its environmental impact depends on how it is manufactured, whether it is recyclable, and how long it stays in use before replacement.
Is vinyl fencing low maintenance?
Vinyl fencing is considered low maintenance because it does not usually need painting, sealing, or staining after installation. In most cases, occasional cleaning and basic inspections are enough to keep it in good condition.
Can vinyl fencing get damaged?
Vinyl fencing can be damaged by heavy impact, improper installation, or extreme weather conditions. While it is built to be durable, it still needs careful handling and proper support to reduce the risk of cracks or other issues.
How do I choose a vinyl fence?
Choosing a vinyl fence depends on how much privacy you want, the look you prefer, and the layout of your property. It is also important to consider fence height, panel style, and any local rules that may affect your options.
Get Reliable Results with Professional Fence Installation
DIY fence installation can be a rewarding project when done correctly. With proper planning, accurate measurements, and careful post setting, homeowners can achieve durable and visually appealing results.
However, precision is what determines long-term success. Even small missteps in alignment, depth, or spacing can lead to costly repairs later.
For homeowners who want to avoid those risks and ensure a clean, professional finish, working with an experienced local company like Connecticut Fence & Gate can provide peace of mind and dependable results.
Contact Connecticut Fence & Gate to get started on your fence project!